Technique Tips: The Importance Of Freestyle Head Positioning
Technique Tips: The Importance Of Freestyle Head Positioning
Temarie Tomley, a swimmer for the University of Alabama, talks about the importance of head positioning in freestyle swimming. Along with technique tips, she shares a drill to practice as well.
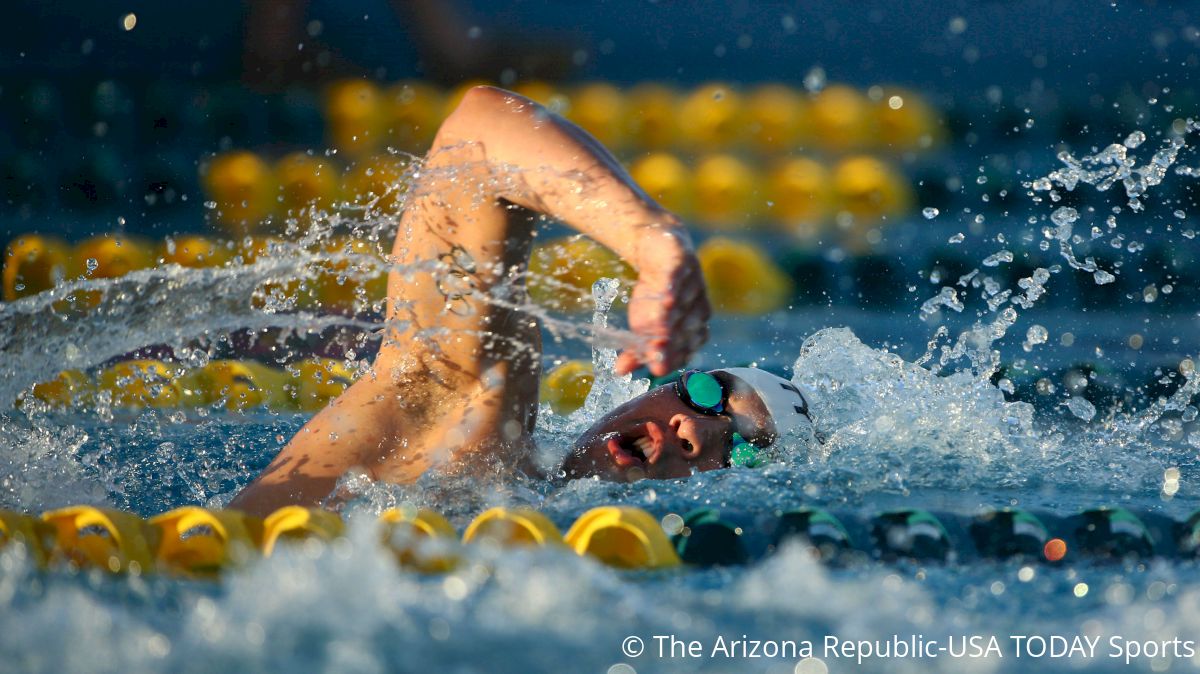
Today's technique is freestyle head positioning. At the collegiate level, the minor details count and the earlier you master them, the faster you will become. It seems like a small thing, but is one of the most important and simplest aspects of the freestyle stroke.
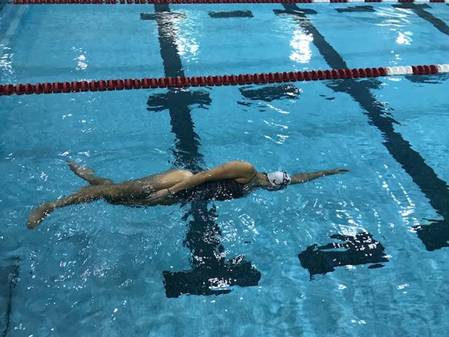
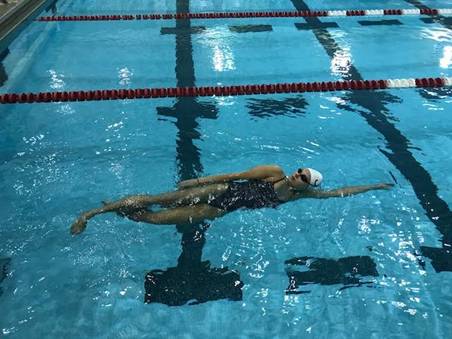
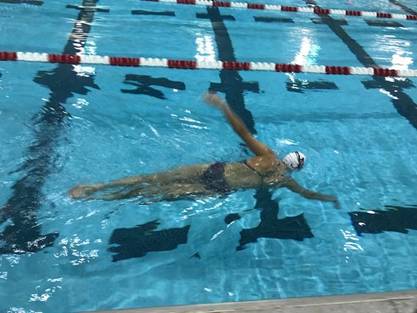
When swimming, your head should be facing down and in line with your body. If it's looking forward or too far backward toward your toes, then you will lose balance in the water and slow yourself down. It's easy to keep your head in line when you're not breathing and just swimming, but what about when you breathe?
If your head is in-line on the breath, then it should feel as if your mouth is trying to lift a bit higher than your eyes and your eyes should be looking straight to the side and slightly forward. You should never feel as if your eyes are looking behind you or that your eyes are tilted way higher up than your mouth. Doing either of these would immediately set yourself off balance, cause you to waste precious energy, and slow down your freestyle.
The drill has several levels that one can build upon once mastering each step. It's crucial that each step be mastered before advancing onto the next progression. It helps to always have someone watching as you're working on technique so that you can make sure you're doing it correctly. It would be even better if you could get a video of yourself so that you can take a look later and connect the feel to what it looks like.
8x25 rest 20 seconds between each
#1: Start on the left side, left arm extended while kicking, with your head facing the bottom of the pool. Remain on your side. Rotate your head in line to breathe from one shoulder to the other while keeping everything as still as possible and not using your extended arm for leverage. The extended arm should be stiff while the hand remains loose (able to wiggle your fingers freely). Continue this through the whole length of the 25.
#2: Do the drill again on your left side -- using coaches feedback as reinforcement.
#3: Do the drill above but on your right side.
#4: Do the drill again on your right side -- using coaches feedback as reinforcement.
#5: Building onto step one, you are going to do that breath rotation twice, starting on your left side, and then you will take a stroke to the other side and take two breath rotations on the right side. This pattern is continued down the length of the pool. The focus on this step is in the stroke that switches you from one side to the next.
The stroke needs to be connected, meaning that the end of the extended arm finish should hit at the same time that the back arm hits the water at the top. The arms should be straight with a slight bend in the pulling arm and should look like they are one line from your fingertips on one side to the other. This rotation should continue onto your other side, arm extended, head facing down, kicking, and ready for the next breath. The biggest thing to watch is arm crossover at the top when the stroke occurs. If the hand crosses over the center body line at the top, this means you're over rotating and this can be avoided by going slower in your stroke movement
#6: Do the above drill again down the length of the pool. Continue this drill for as many 25s as needed.
#7: Once you have gotten a good feel of where your head should be in static and breathing position (which usually means lots of repetition in order to train your mind to the feeling and movement), then you are ready to incorporate it into a lap of slow, but excellent, head positioning technique.
#8: Do another lap of excellent head positioning technique. Keep it slow. Only increase speed with mastering of head positioning technique.
---
Temarie Tomley is a rising senior on the University of Alabama swimming and diving Team. The Cincinnati, Ohio, native specializes in the freestyle and backstroke events. You can read her full bio here.
--
Static Head Positioning
When swimming, your head should be facing down and in line with your body. If it's looking forward or too far backward toward your toes, then you will lose balance in the water and slow yourself down. It's easy to keep your head in line when you're not breathing and just swimming, but what about when you breathe?Breathing Head Positioning
The harder part of head positioning is in the breath. Taking a breath isn't static; it is a dynamic movement in the middle of forward motion. It is easy for a swimmer to pick the head up or keep it too tucked when taking a breath. When taking a breath, it should feel as if you are just turning your head. You should not feel like you're tucking your head or overextending your neck in any way.If your head is in-line on the breath, then it should feel as if your mouth is trying to lift a bit higher than your eyes and your eyes should be looking straight to the side and slightly forward. You should never feel as if your eyes are looking behind you or that your eyes are tilted way higher up than your mouth. Doing either of these would immediately set yourself off balance, cause you to waste precious energy, and slow down your freestyle.
Drills
No worries if your head positioning isn't what it should be. There is a drill that can help you sort it out! I have been working on this for about a month and have already seen great improvements in my technique. I originally learned this drill from Glenn Mills, a former Alabama national championship swimmer who came to our practice to film us and help us out on some of our technical swimming issues.The drill has several levels that one can build upon once mastering each step. It's crucial that each step be mastered before advancing onto the next progression. It helps to always have someone watching as you're working on technique so that you can make sure you're doing it correctly. It would be even better if you could get a video of yourself so that you can take a look later and connect the feel to what it looks like.
Set:
8x25 rest 20 seconds between each
#1: Start on the left side, left arm extended while kicking, with your head facing the bottom of the pool. Remain on your side. Rotate your head in line to breathe from one shoulder to the other while keeping everything as still as possible and not using your extended arm for leverage. The extended arm should be stiff while the hand remains loose (able to wiggle your fingers freely). Continue this through the whole length of the 25.


#2: Do the drill again on your left side -- using coaches feedback as reinforcement.
#3: Do the drill above but on your right side.
#4: Do the drill again on your right side -- using coaches feedback as reinforcement.
#5: Building onto step one, you are going to do that breath rotation twice, starting on your left side, and then you will take a stroke to the other side and take two breath rotations on the right side. This pattern is continued down the length of the pool. The focus on this step is in the stroke that switches you from one side to the next.
The stroke needs to be connected, meaning that the end of the extended arm finish should hit at the same time that the back arm hits the water at the top. The arms should be straight with a slight bend in the pulling arm and should look like they are one line from your fingertips on one side to the other. This rotation should continue onto your other side, arm extended, head facing down, kicking, and ready for the next breath. The biggest thing to watch is arm crossover at the top when the stroke occurs. If the hand crosses over the center body line at the top, this means you're over rotating and this can be avoided by going slower in your stroke movement

#6: Do the above drill again down the length of the pool. Continue this drill for as many 25s as needed.
#7: Once you have gotten a good feel of where your head should be in static and breathing position (which usually means lots of repetition in order to train your mind to the feeling and movement), then you are ready to incorporate it into a lap of slow, but excellent, head positioning technique.
#8: Do another lap of excellent head positioning technique. Keep it slow. Only increase speed with mastering of head positioning technique.
Purpose/ Big Picture
Although freestyle head positioning seems like something minor, it has a significant impact on your speed and the results are well worth it in the long run. It's an easy fix that will keep you balanced and in line in the water, which will make you faster. Anything with technique takes repetition and time, so patience and continuous practice is key to mastering this drill and technique.---
Temarie Tomley is a rising senior on the University of Alabama swimming and diving Team. The Cincinnati, Ohio, native specializes in the freestyle and backstroke events. You can read her full bio here.
--