I Have My Underwater Camera, But Now What?
I Have My Underwater Camera, But Now What?
Abbie Fish of Ritter Sports Performance talks about the best camera angles to use when filming a swimmer underwater with a GoPro.
For those of you who took the plunge and bought an underwater camera after last week's post -- awesome job. This week, I plan to detail a step-by-step guide on how to maximize your camera's functions and get the best video clip possible of your swimmer's strokes! We will be using the GoPro Hero Session as our example camera for this week's post.
Let's get started:
Before filming underwater, you want to make sure of a few things:
Including: your suction cup mount, fully charged camera, camera's housing (if applicable), SD card, and pin/screw. Also -- cloth and screen cleaner is helpful but not required.
When inside -- make sure the pool is well lit and all lights in the pool area are turned on and working.
Try to go at a time that this lane is available. Ask a lifeguard if he or she knows of any of the regular lap swimmers' schedules to avoid conflict.
If there is a lane line right by the wall, ask the lifeguard if he or she can move that lane line for a period of time. Or you can set up with pool management prior to the filming day if line lane adjustments are needed.
Once you have all check marked all factors (1-6), you are ready to shoot! Let's discuss various camera angles...
My TOP 3 favorite camera angles are:
1.) Side-View, Stationary
2.) Head-On, Stationary
3.) Below, Stationary
Each angle has its pros and cons. For example, when you shoot a below, stationary clip -- you may see a stroke or 1/2 a stroke depending on size of swimmer, speed, and the camera's view settings. Although this may seem like a non-beneficial view -- it is actually the only angle that allows you to see the pull pattern of both arms simultaneously in butterfly and breaststroke. So before you nix any of these camera viewpoints -- hear me out.
This is my favorite angle from which to film. This angle gives you a solid few recorded strokes and details on your swimmer's body alignment, head positioning, and kick pattern. Also, you can change the swimmer's direction (left to right or right to left) to mix up the arm that is being filmed closest to the camera's lens.
Requirements: When you're shooting from a side-view, stationary position -- have your swimmer start at the end of the pool and swim 15 meters at a 90 percent effort -- focusing on his or her technique. Be sure to suction cup the camera about 10m or so away from the swimmer and about 1 to 1 1/2 feet below the surface of the water. Remind the swimmer to swim as close to the lane line as possible (away from the wall).
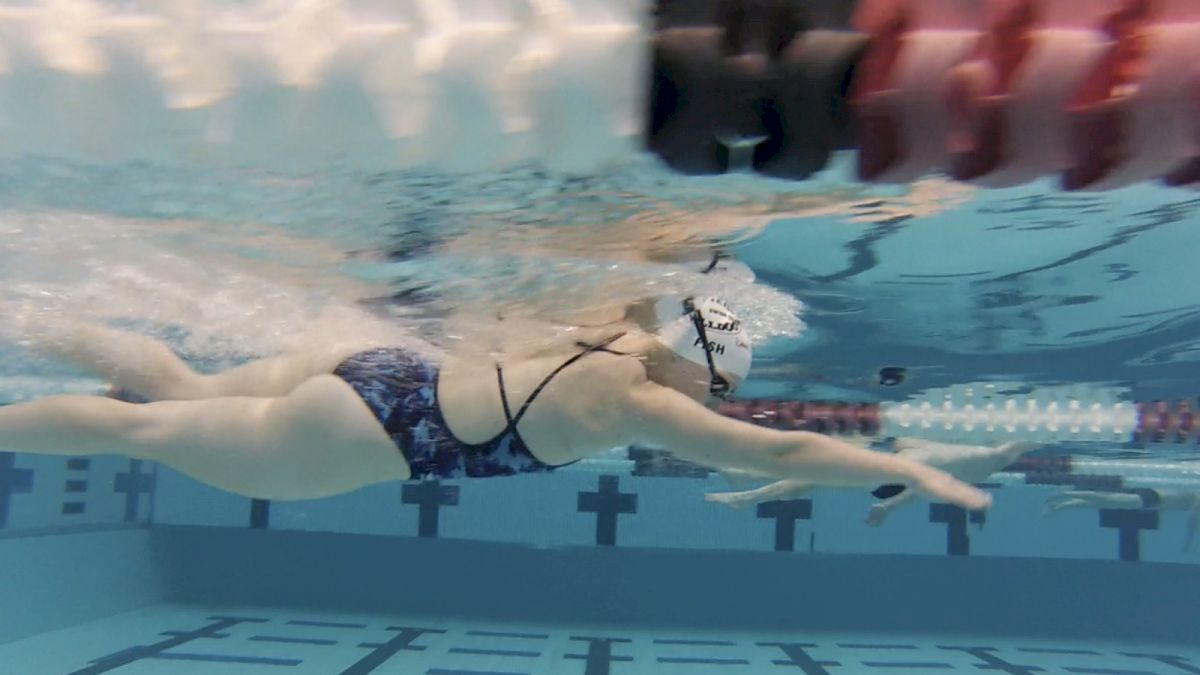
Here's an example of when a swimmer is too close to the camera while filming a side view, stationary angle:
Head-On, Stationary
This is my second favorite angle from which to film. This angle is great because you can really see your swimmer's point of entry (before the catch) and his or her type of pulling for each stroke. Also, if the water quality is not good that day, you will notice it significantly during head-on clips.
Requirements: When you're shooting from a head-on, stationary position -- have your swimmer start at the flags on the other side of the pool (~20m from you). Remind them to swim at a 90 percent effort -- focusing on his or her technique and directly over the black line. Be sure to suction cup the camera in the middle of the "T" at the end of the lane -- about ~1 1/2 feet below the surface of the water.
Word to the wise: If you are recording clips and the swimmer is not in the middle of the frame (in either the side-view or head-on, stationary angles), change the depth of your camera. If the swimmer is too high in the recorded frame, bring the camera toward the surface. And if the swimmer is too low in the recorded frame, put the camera deeper.
Be sure to take into account your pool's gutter system when securing your camera to the wall -- it may be the added depth of the gutter that's moving the swimmer outside the middle of the frame.
Here's an example of when the camera is too close to the surface of the water.
Below, Stationary
This is my least favorite angle, but it is still necessary to get an overall picture of your swimmer's stroke. As stated earlier, you don't get multiple strokes recorded -- like you do with the other two angles -- but you can see pulling patterns. This is the main difference between the below and head-on, stationary angles. In the head-on, stationary angle, you can see whether a swimmer crosses over, but you can't see his or her pull from start to finish (i.e. is there an "S" pull?) -- like you can with a below, stationary angle.
Requirements: When you're shooting from a below, stationary position -- have your swimmer start on the wall and place the camera about 10m away from the swimmer at bottom of the pool, in the middle of the black line. Be sure to face the lens directly up!
If you are using a GoPro Hero Session, you don't need the suction cup for this angle -- just put the camera on the bottom of the pool with the lens facing the surface when you're ready to record. Remind your swimmer to swim at a 90 percent effort -- focusing on his or her technique and directly over the black line for 20m.
If you record a swimmer's strokes at each of these different angles -- you will have a very good overall picture of their swimming technique. If you have videos of you or one of your own swimmer's and would like them analyzed -- I'd love to do that for you. Be sure to subscribe below and we'll get started.
---
Abbie Fish has been in the competitive swimming realm for over 20 years. After capping off a successful career at University of Georgia, Abbie soon found herself back on the deck as a coach.
Currently, Abbie is a Technique Swim Coach at Ritter Sports Performance. She spends her time analyzing race videos and studying different style of stroke technique. If you'd like your stroke analyzed, or a swimmer of yours -- visit their website: www.rittersp.com/video for more information or email Abbie at abbie@rittersp.com
---
Let's get started:
Before filming underwater, you want to make sure of a few things:
1.) You have all your equipment
Including: your suction cup mount, fully charged camera, camera's housing (if applicable), SD card, and pin/screw. Also -- cloth and screen cleaner is helpful but not required.2.) Your camera settings are ready to go
You've set your camera to a resolution of 720 or higher. Also, the camera is set to 60fps or more. Lastly, make sure your camera is set to a medium angle view -- especially for GoPros (avoid wide or super views).3.) The lighting is appropriate
When outside -- you don't ever want to shoot with your lens directly facing the sun.When inside -- make sure the pool is well lit and all lights in the pool area are turned on and working.
4.) The water quality is clear and not cloudy
This may be completely out of your control, but if you go into the pool to film and realize the pool is very cloudy -- come back another day. It will better suit your time than to film and realize you cannot see much about your swimmer's technique due to the cloudiness of the water.
5.) You can snag the lane closest to the wall
Try to go at a time that this lane is available. Ask a lifeguard if he or she knows of any of the regular lap swimmers' schedules to avoid conflict.
6.) There are no lane lines blocking your camera's view
If there is a lane line right by the wall, ask the lifeguard if he or she can move that lane line for a period of time. Or you can set up with pool management prior to the filming day if line lane adjustments are needed.Once you have all check marked all factors (1-6), you are ready to shoot! Let's discuss various camera angles...
My TOP 3 favorite camera angles are:
1.) Side-View, Stationary
2.) Head-On, Stationary
3.) Below, Stationary
Each angle has its pros and cons. For example, when you shoot a below, stationary clip -- you may see a stroke or 1/2 a stroke depending on size of swimmer, speed, and the camera's view settings. Although this may seem like a non-beneficial view -- it is actually the only angle that allows you to see the pull pattern of both arms simultaneously in butterfly and breaststroke. So before you nix any of these camera viewpoints -- hear me out.
Side-View, Stationary
This is my favorite angle from which to film. This angle gives you a solid few recorded strokes and details on your swimmer's body alignment, head positioning, and kick pattern. Also, you can change the swimmer's direction (left to right or right to left) to mix up the arm that is being filmed closest to the camera's lens.
Requirements: When you're shooting from a side-view, stationary position -- have your swimmer start at the end of the pool and swim 15 meters at a 90 percent effort -- focusing on his or her technique. Be sure to suction cup the camera about 10m or so away from the swimmer and about 1 to 1 1/2 feet below the surface of the water. Remind the swimmer to swim as close to the lane line as possible (away from the wall).
Here's an example of when a swimmer is too close to the camera while filming a side view, stationary angle:
Head-On, Stationary
This is my second favorite angle from which to film. This angle is great because you can really see your swimmer's point of entry (before the catch) and his or her type of pulling for each stroke. Also, if the water quality is not good that day, you will notice it significantly during head-on clips.
Requirements: When you're shooting from a head-on, stationary position -- have your swimmer start at the flags on the other side of the pool (~20m from you). Remind them to swim at a 90 percent effort -- focusing on his or her technique and directly over the black line. Be sure to suction cup the camera in the middle of the "T" at the end of the lane -- about ~1 1/2 feet below the surface of the water.
Word to the wise: If you are recording clips and the swimmer is not in the middle of the frame (in either the side-view or head-on, stationary angles), change the depth of your camera. If the swimmer is too high in the recorded frame, bring the camera toward the surface. And if the swimmer is too low in the recorded frame, put the camera deeper.
Be sure to take into account your pool's gutter system when securing your camera to the wall -- it may be the added depth of the gutter that's moving the swimmer outside the middle of the frame.
Here's an example of when the camera is too close to the surface of the water.
Below, Stationary
This is my least favorite angle, but it is still necessary to get an overall picture of your swimmer's stroke. As stated earlier, you don't get multiple strokes recorded -- like you do with the other two angles -- but you can see pulling patterns. This is the main difference between the below and head-on, stationary angles. In the head-on, stationary angle, you can see whether a swimmer crosses over, but you can't see his or her pull from start to finish (i.e. is there an "S" pull?) -- like you can with a below, stationary angle.
Requirements: When you're shooting from a below, stationary position -- have your swimmer start on the wall and place the camera about 10m away from the swimmer at bottom of the pool, in the middle of the black line. Be sure to face the lens directly up!
If you are using a GoPro Hero Session, you don't need the suction cup for this angle -- just put the camera on the bottom of the pool with the lens facing the surface when you're ready to record. Remind your swimmer to swim at a 90 percent effort -- focusing on his or her technique and directly over the black line for 20m.
If you record a swimmer's strokes at each of these different angles -- you will have a very good overall picture of their swimming technique. If you have videos of you or one of your own swimmer's and would like them analyzed -- I'd love to do that for you. Be sure to subscribe below and we'll get started.
---
Abbie Fish has been in the competitive swimming realm for over 20 years. After capping off a successful career at University of Georgia, Abbie soon found herself back on the deck as a coach.
Currently, Abbie is a Technique Swim Coach at Ritter Sports Performance. She spends her time analyzing race videos and studying different style of stroke technique. If you'd like your stroke analyzed, or a swimmer of yours -- visit their website: www.rittersp.com/video for more information or email Abbie at abbie@rittersp.com
---